Removal
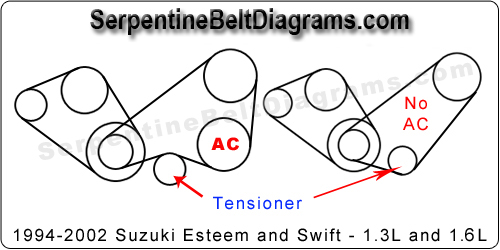
Start by removing the air cleaner and the air compressor pipe bracket. Now jack up the front end of your vehicle and support it securely. Be sure to apply your parking brake and chock the tires. Remove the right side splash guard. Rotate the tensioner pulley to create slack on the belt and slip it off.
Installation
Be sure to inspect all of the pulleys and make sure they are not damaged in any way and are clean and free of any debris or fluids.
Installation is the reverse of the removal. Route the belt according to the diagram above leaving the tensioner for last. Finally, rotate the tensioner and slip the belt on.
